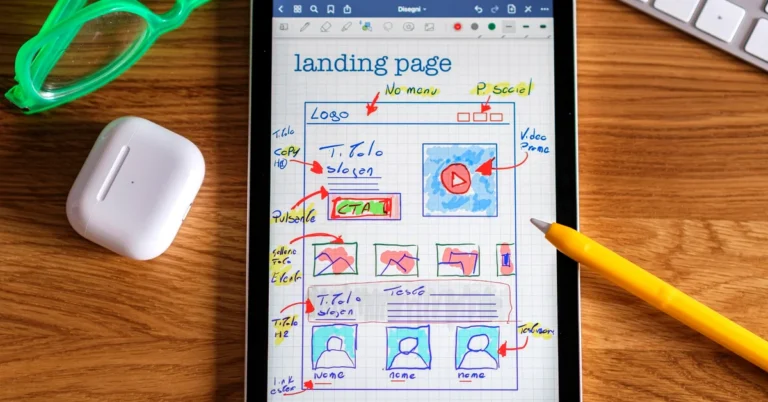

Learn where to place email opt-ins on a blog post so readers can discover your lead magnet without feeling overwhelmed by forms, popups, or competing calls to action.
An email opt-in can help turn a one-time blog visitor into someone you can continue helping after they leave your site.
But placement matters.
If the opt-in interrupts the reader too early, appears too often, or competes with the article itself, it can make the page feel more like a sales funnel than a useful resource.
The goal is not to put a signup form everywhere you can.
The goal is to place it where the reader has enough context to understand why joining your email list would be useful.
A good email opt-in should feel like the next helpful step, not an obstacle between the reader and the content they came for.
A visitor normally arrives because of the article, not because they woke up hoping to join another email list.
Your first responsibility is therefore to satisfy the reason they clicked.
That does not mean you should hide your email signup until the very bottom of every page.
It means the timing and context of the invitation should make sense.
Email is still one of the most useful assets an affiliate marketer can build because it gives interested readers a way to continue the relationship beyond a single visit.
If you are still deciding whether list building belongs in your strategy, see Why Affiliate Marketers Should Build an Email List From Day One.
The best location depends partly on the article.
A short beginner answer may need a different approach from a detailed tutorial.
A highly relevant lead magnet may deserve more visibility than a generic newsletter signup.
A visitor coming from search may behave differently from someone who already knows your site.
Instead of searching for one universal placement rule, think about the reader’s progression through the page.
At each possible opt-in location, ask:
Those questions are more useful than simply asking which position gets the highest number of impressions.
An opt-in near the top of an article can work when the resource is extremely relevant to the visitor’s reason for arriving.
But there is an important distinction between near the beginning and before the reader has received anything useful.
If someone clicks an article and immediately encounters a large signup form before understanding what the page contains, the request can feel premature.
A better approach is often to let the introduction establish the problem first.
Explain what the article will help the reader understand.
Give them enough information to confirm that they are in the right place.
Then, if the lead magnet is tightly connected to that problem, a compact opt-in can make sense.
This works particularly well when the free resource extends the article rather than changing the subject.
The middle of a useful article is often one of the strongest places for an email opt-in.
By that point, the reader has already consumed part of your content.
You have had an opportunity to demonstrate that the page is useful.
The reader also has enough context to understand why a related free resource might help.
A mid-article opt-in works best when it appears at a natural transition rather than splitting a sentence, list, or tightly connected section.
For example, you might place it after completing one major concept and before beginning the next.
That creates a pause in the article where the invitation feels less disruptive.
Placement alone cannot rescue an irrelevant offer.
If the article is about email marketing but the opt-in offers an unrelated traffic checklist, the reader may ignore it even if the form is beautifully placed.
Relevance is usually more important than clever positioning.
The opt-in should answer a question such as:
What would this reader naturally want after reading this section?
That may be:
For a deeper look at that decision, see How to Match a Blog Post to the Right Lead Magnet.

The bottom of the article is another natural opt-in location.
A reader who reaches the end has already demonstrated more interest than someone who leaves after the first few paragraphs.
You have also completed the promise of the article before asking for another action.
That makes the end of the post a good place for a stronger next-step invitation.
The message can be simple:
The end-of-post opt-in should not feel like a completely new sales pitch.
It should continue the subject the reader was already exploring.
More signup forms do not automatically produce a better reader experience.
If the same large opt-in appears after every few paragraphs, the article begins to feel fragmented.
The reader may spend more time dismissing or scrolling past calls to action than consuming the content.
A practical model for a longer article is:
You may need fewer than three.
The point is to create deliberate opportunities rather than covering the page with forms.
A sidebar can still provide a useful secondary signup location on desktop layouts.
It stays visible without interrupting the flow of the article itself.
But sidebar behavior changes significantly on mobile.
On a phone, the sidebar may move beneath the article, disappear, or become less prominent depending on the site’s responsive layout.
That is why an opt-in strategy should not depend entirely on a desktop sidebar.
Inline placements inside the article are generally easier to control across screen sizes.
Popups can generate visibility, but visibility is not the only consideration.
A popup that immediately covers most of the article can frustrate someone who has not even had a chance to read the first paragraph.
This matters particularly on mobile, where the available screen area is much smaller.
Google’s official page experience guidance specifically includes avoiding intrusive interstitials among the questions site owners should consider when evaluating the experience of a page.
That does not mean every popup is automatically bad.
It means the signup method should not make the main content unnecessarily difficult to access.
If you use a popup, consider timing and size carefully.
Giving the visitor time to engage with the page before presenting another decision is often a better experience than interrupting immediately.
A blog post can easily accumulate competing calls to action.
You may have:
Each individual element may seem reasonable.
Together, they can create confusion.
Decide what the primary next step is for the article.
If the article is primarily designed to build the email list, let the opt-in have enough visual space to be understood without surrounding it with several unrelated promotions.
A signup form is not successful merely because someone submits an email address.
The experience that follows matters too.
The subscriber needs to reach the correct next page.
The promised resource needs to be available.
The first email needs to arrive.
The link needs to work.
The follow-up should make sense.
If you are building that system now, AWeber for a Simple Free-Report Funnel: What to Set Up First walks through the major pieces.
The location and wording of the opt-in create expectations.
If the form promises a free report, the first email should make accessing that report easy.
If the form promises a checklist, the subscriber should not have to search through several paragraphs of promotion to find it.
The email should continue the same experience the reader began on the blog post.
For a practical breakdown, see What to Say in the First Email After Someone Downloads Your Free Report.
The opt-in should connect naturally to the broader funnel.
A simple path might look like this:
Useful article → relevant opt-in → free resource → first email → follow-up → useful next step.
The steps should feel connected.
If each stage suddenly changes topics, the reader has to repeatedly figure out why they are being shown something new.
A coherent funnel reduces that friction.
If you want to understand how those pieces fit together more broadly, review How to Build a Simple Affiliate Marketing Funnel for Beginners.
Never assume that a placement that looks good on desktop will automatically work on a phone.
A banner that feels compact on a large screen may dominate the entire mobile display.
A two-column form may become awkward when stacked.
A button may wrap strangely.
Spacing may become excessive.
Always review the real mobile experience.
Ask:
Mobile QA should be part of the publishing process, not something you remember after visitors complain.
Once the opt-in is live, you can begin learning from real behavior.
Look at the relationship between traffic and subscriptions.
If many people reach the article but almost nobody joins, consider several possible causes:
Do not immediately move the form every day.
Give the page enough activity to learn something useful, then change one meaningful element at a time.

If you want a straightforward starting point for a longer affiliate blog post, use this model:
Only when the lead magnet is highly relevant and the reader has already received enough context to understand the offer.
After a meaningful section, when the reader has received value and the resource naturally extends the topic.
As the final next step for readers who completed the post and want to continue.
Then review the page on desktop and mobile.
If the article feels crowded, remove something.
You do not receive extra credit for using every possible signup location.
Email opt-ins work best when they respect the reason the reader came to the page.
Deliver useful content first.
Offer the signup at a logical moment.
Make the lead magnet relevant.
Avoid overwhelming the reader with repeated interruptions.
Then make sure the experience after signup delivers exactly what was promised.
The best opt-in placement is not simply the place where the form can be seen.
It is the place where joining the list feels like a natural continuation of the article.
Subscribe to get the latest posts sent to your email.
If you found this guide helpful, please tap the Like button and share it with someone who could benefit. Every Like and Share helps more people discover Partner to Wealth.